Plugin configuration
To configure the StackLight Infrastructure Alerting plugin:
Create a new environment as described in Create a new OpenStack environment.
In the Fuel web UI, click the Settings tab and select the Other category.
Scroll down through the settings until you find The StackLight Infrastructure Alerting Plugin section.
Select The StackLight Infrastructure Alerting Plugin and fill in the required fields as indicated below.
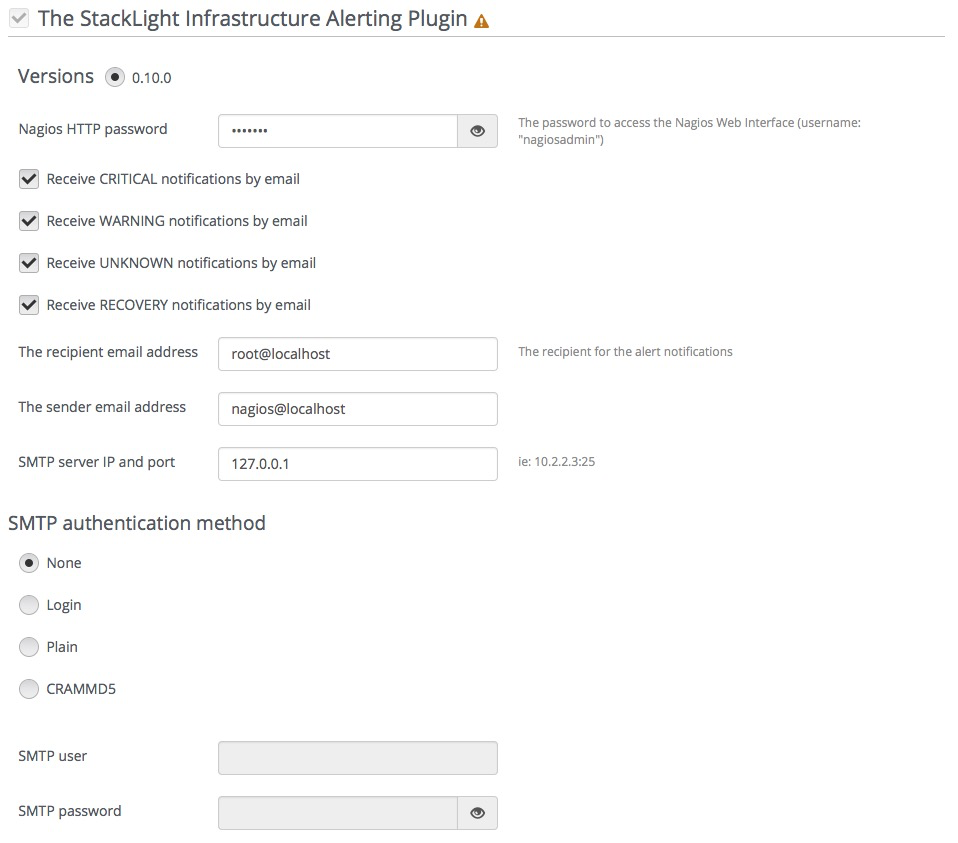
- If required, override the Nagios web interface self-generated password.
- Select the types of notifications that you would like to be alerted for by email (CRITICAL, WARNING, UNKNOWN, RECOVERY).
- Specify the recipient email address for the alerts.
- Specify the sender email address for the alerts.
- Specify the SMTP server address and port.
- Specify the SMTP authentication method.
- Specify the SMTP username and password. This is not required if the authentication method is None.
Select Enable TLS for Nagios if you want to encrypt your Nagios web UI credentials (username, password). Then, fill in the required fields as indicated below.

- Specify the DNS name of the Nagios web UI. This parameter is used to create a link from within the Fuel dashboard to the Nagios web UI.
- Specify the location of the PEM file, which contains the certificate and the private key of the server that will be used in TLS handchecks with the client.
Select Use LDAP for Nagios Authentication if you want to authenticate through LDAP to the Nagios Web UI. Then, fill in the required fields as indicated below.
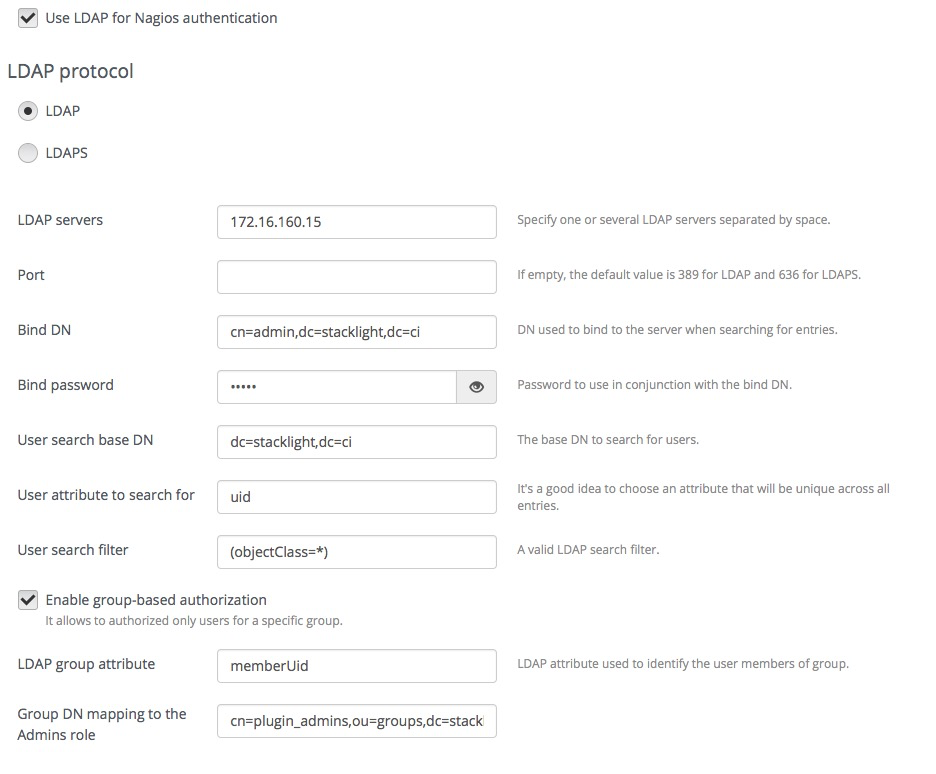
- Select the LDAPS if you want to enable LDAP authentication over SSL.
- Specify one or several LDAP server addresses separated by a space. These addresses must be accessible from the node where Nagios is installed. Addresses outside the management network are not routable by default (see the note below).
- Specify the LDAP server port number or leave it empty to use the defaults.
- Specify the Bind DN of a user who has search privileges on the LDAP server.
- Specify the password of the user identified by Bind DN above.
- Specify the User search base DN in the Directory Information Tree (DIT) from where to search for users.
- Specify a valid User search filter to search for users. The search should return a unique user entry.
You can further restrict access to the Nagios web UI to those users who are members of a specific LDAP group. However, with the Nagios web UI there is no notion of privileged (admin) access.
- Select Enable group-based authorization to restrict the access to a group of users.
- Specify the LDAP attribute in the user entry to identify the group of users.
- Specify the DN of the LDAP group that has access to the Nagios web UI.
Configure your environment as described in Configure your Environment.
Note
By default, StackLight is configured to use the management network, of the so-called Default Node Network Group. While this default setup may be appropriate for small deployments or evaluation purposes, it is recommended that you not use this network for StackLight in production. Instead, create a network dedicated to StackLight. Using a dedicated network for StackLight should improve performance and reduce the monitoring footprint. It will also facilitate access to the Nagios web UI after deployment.
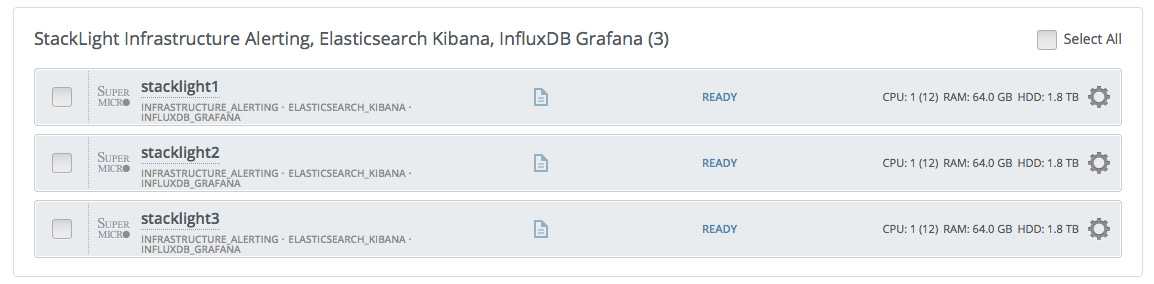
Click the Nodes tab and assign the Infrastructure_Alerting role to the node or multiple nodes where you want to install the plugin.
The example below shows that the Infrastructure_Alerting role is assigned to three nodes alongside with the Elasticsearch_Kibana role and the InfluxDB_Grafana role. The three plugins of the LMA toolchain back-end servers are installed on the same node.
Note
Nagios clustering for high availability requires assigning the Infrastructure_Alerting role to three different nodes. You can add or remove nodes with the Infrastructure_Alerting role after deployment.
If required, adjust the disk partitioning as described in Configure disk partitioning.
By default, the StackLight Infrastructure Alerting plugin allocates:
- 20% of the first available disk for the operating system by honoring a range of 15 GB minimum and 50 GB maximum
- 10 GB for
/var/log - At least 20 GB for the Nagios data in
/var/nagios
The deployment will fail if the above requirements are not met.
Deploy your environment as described in Deploy an OpenStack environment.